DIY Recycled PVC Pipe Gutters for a Water Collection System.

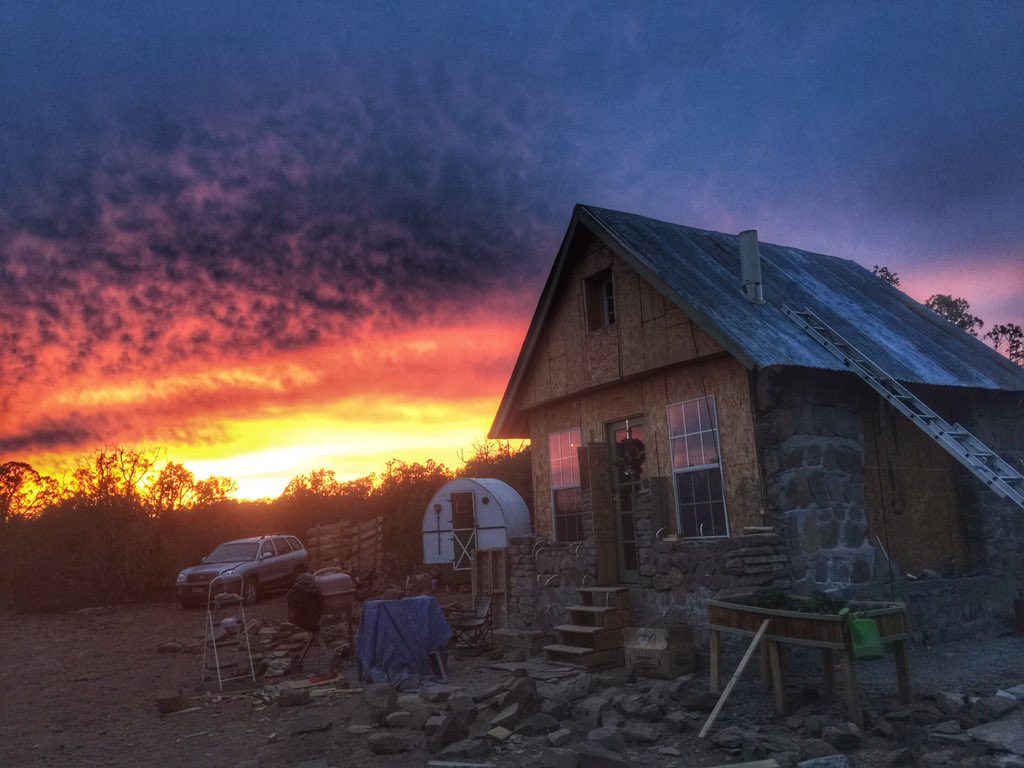
Due to our longstanding drought here in the southwestern United States I decided to build a water collection system out of PVC pipe and an old IBC water tote.

Because of our remote location which is over 3 hours from the nearest hardware store we made due with a lot of the things we had on hand. As a result, I probably would have used some different things but, again, it’s what we had.

IMG_4485

What you’ll need:

A 4 inch or wider PVC pipe the length of your application.

one round end piece for the pipe

one elbow connector

one 3-way connector

Two 6 foot pieces of 2 inch PVC

One flanged PVC pipe adapter

PVC pipe glue

Hanger straps

Screws

An IBC tote or barrel to catch the water.

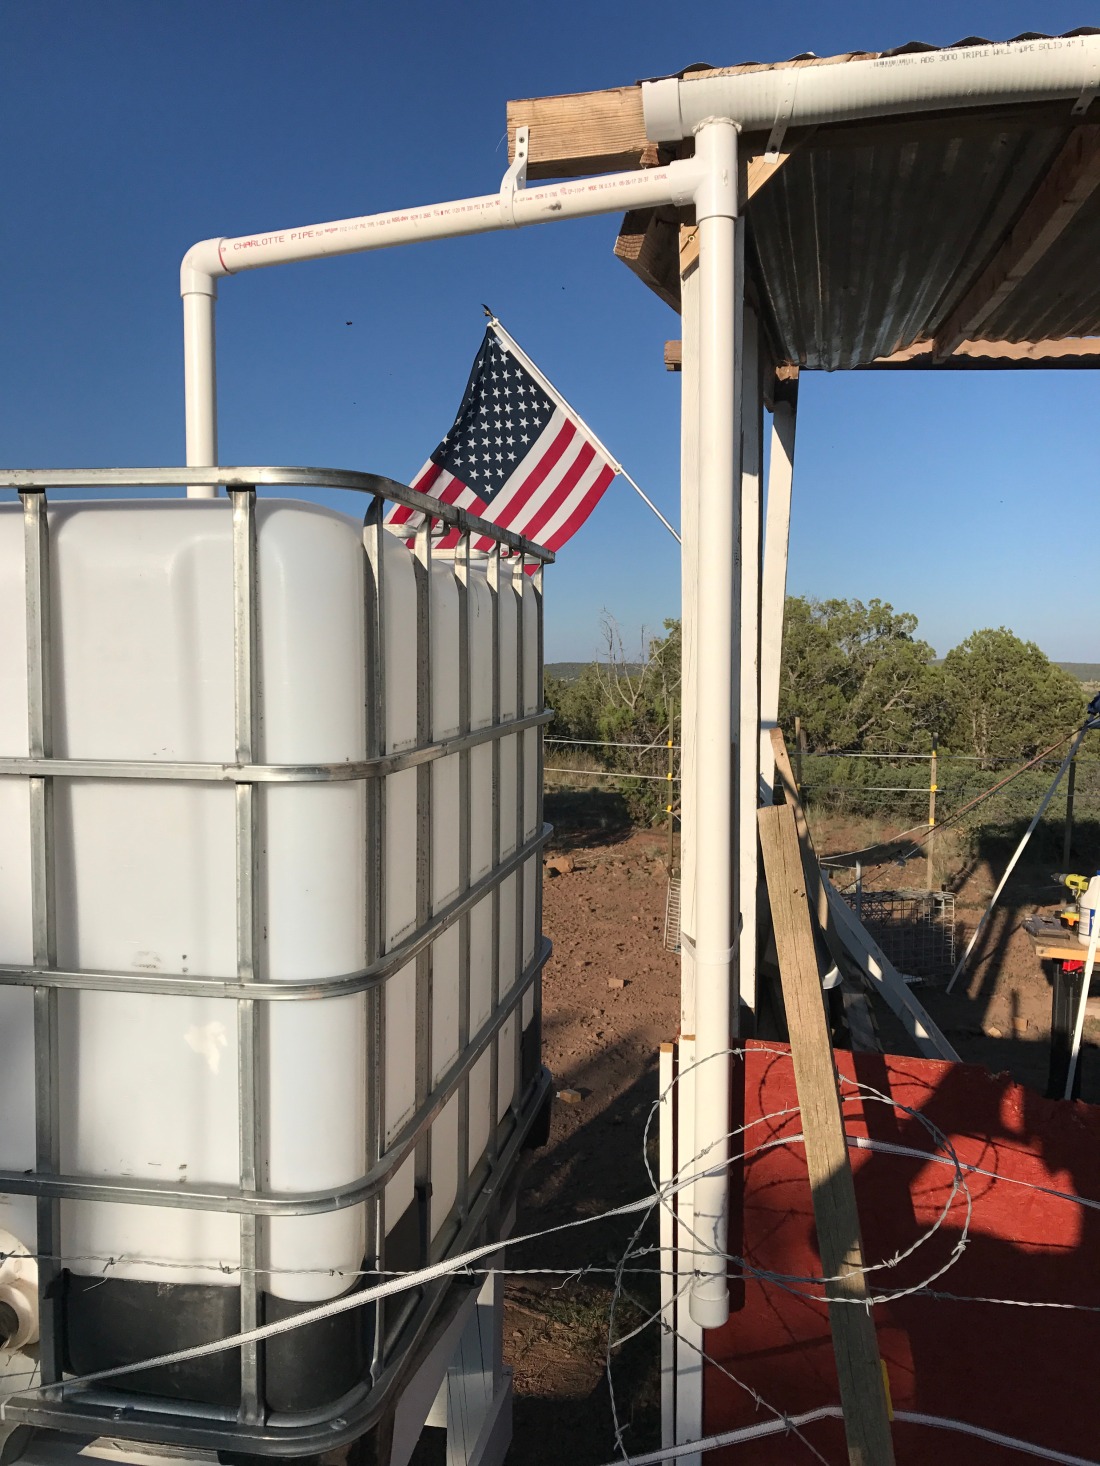
The system is designed to catch run off rain water from the roof of the shed into the PVC pipe rain gutters. From here it’s transported by gravity first into a gutter run out where the dirt from the roof will settle and then once full will overflow into the IBC tote.

Step 1.

Cut your 4 inch or wider round PVC in half length wise to create a half pipe which will be the gutter. I used a simple battery powered circular saw with pretty good success. Nothing fancy.

IMG_4451.JPG

Step 2.

Next cut your PVC pipe end caps in half. These will each be glued to each end of the gutter pipe to prevent water from flowing out the ends. Again, I used the circular saw.

IMG_4457

Step 3.

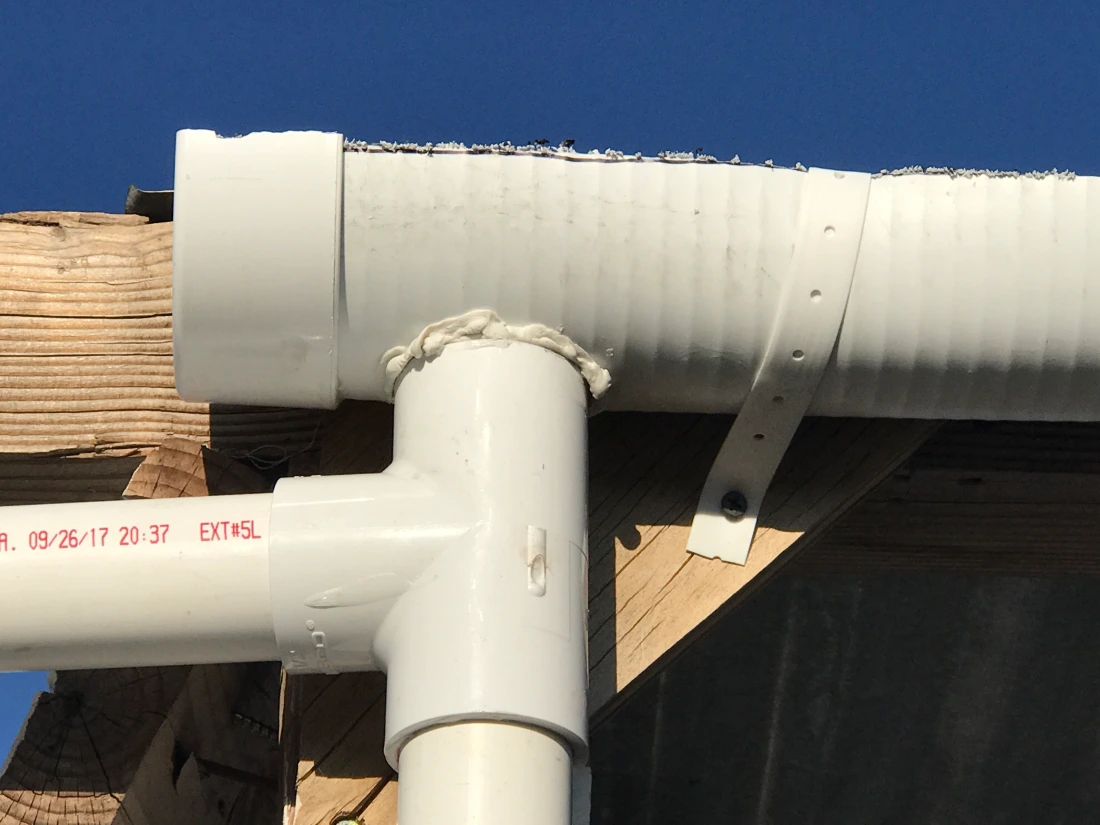
Once the end pieces are glued into place from step 2 you can drill a hole for the run out PVC pipe. I used a hole drill bit to make it a little quicker. Once the hole was drilled I glued in a flanged PVC adapter piece so that the flange would rest inside the gutter pipe and support the weight of the run out pipe.
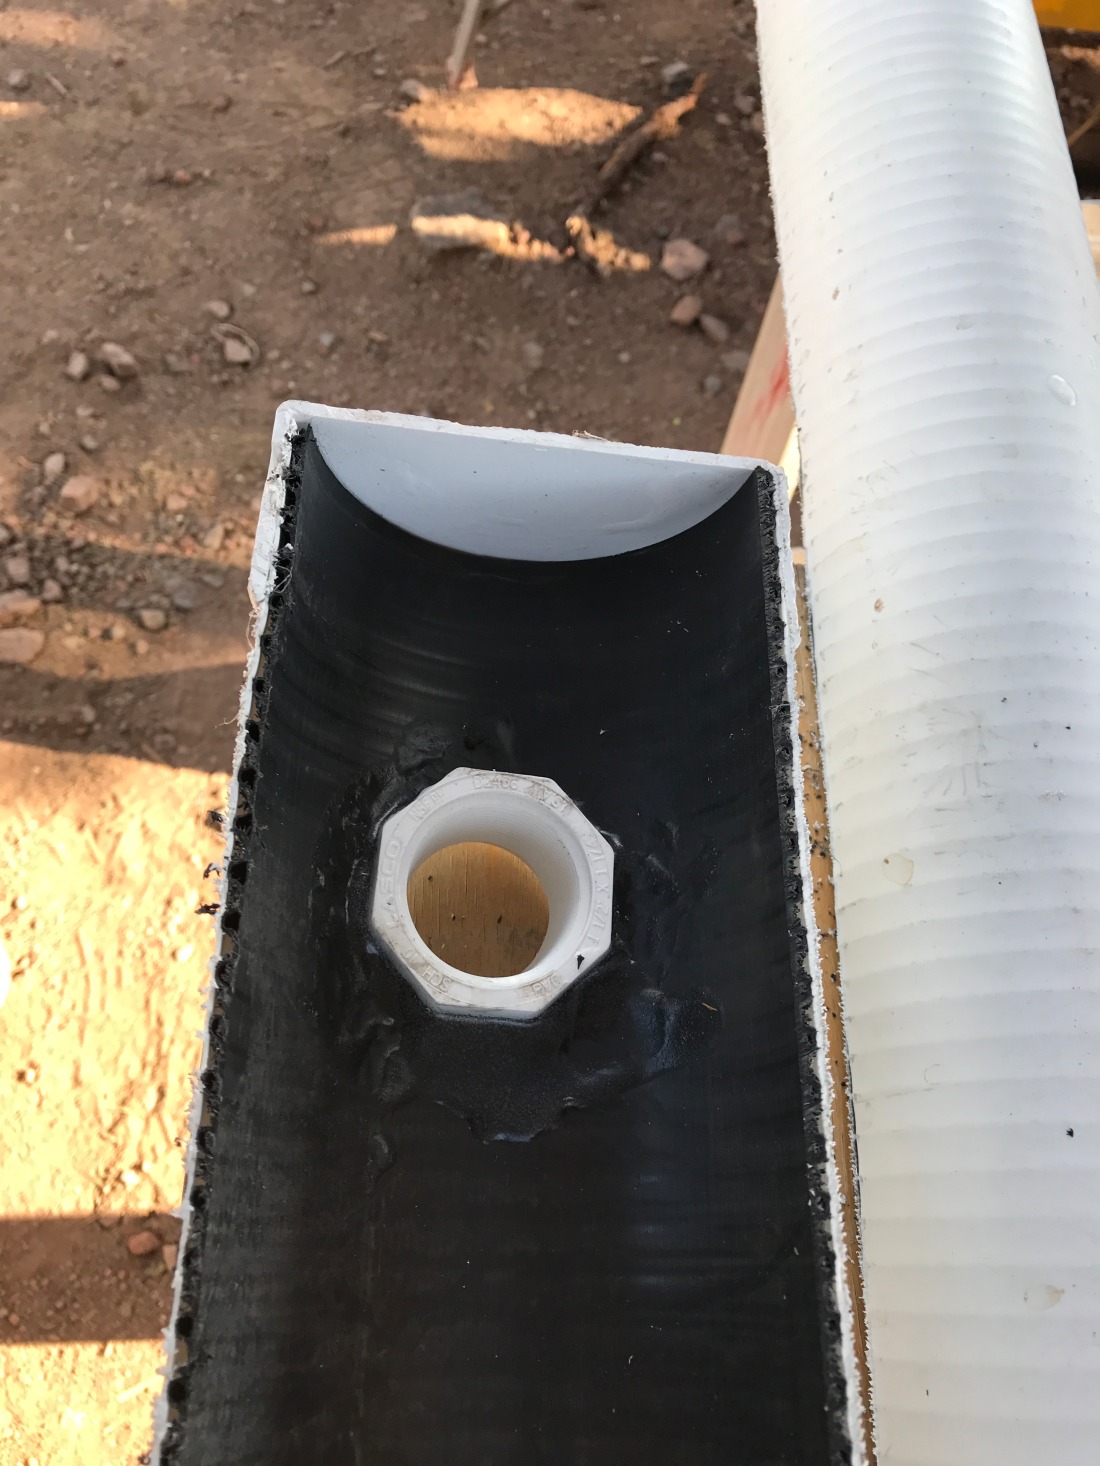
 IMG_4458

Step 4.

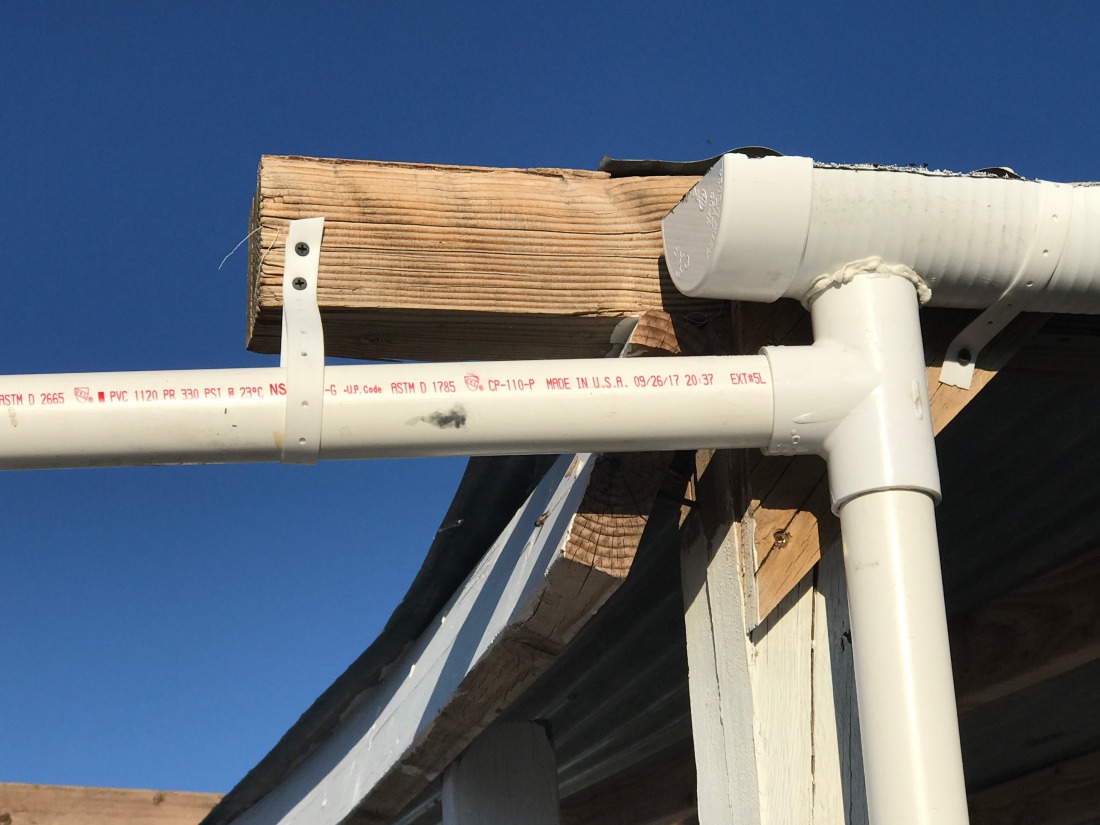
I then put the assembly up for a test fit. Once I felt comfortable with the alignment I screwed the gutter to the rafter at a slight downward angle so the rain water would run toward the hole and down the run out . I used 1 3/4 inch wood screws at 12 inch intervals through the PVC pipe into the wood for stabilization. Once this was done I took my hanger straps and at 15 inch increments I encircled the pipe and screwed these to the rafter as well. These hanger straps reduce sag and help support the weight of rain and snow. The steel version probably would have been better.

IMG_4487

Step 5.

Once the gutter was up and stable the 3-way connector was attached to the bottom end of the flanged adapter and glued into place. I used some caulking to be sure nothing leaked as well.

IMG_4489

Step 6.

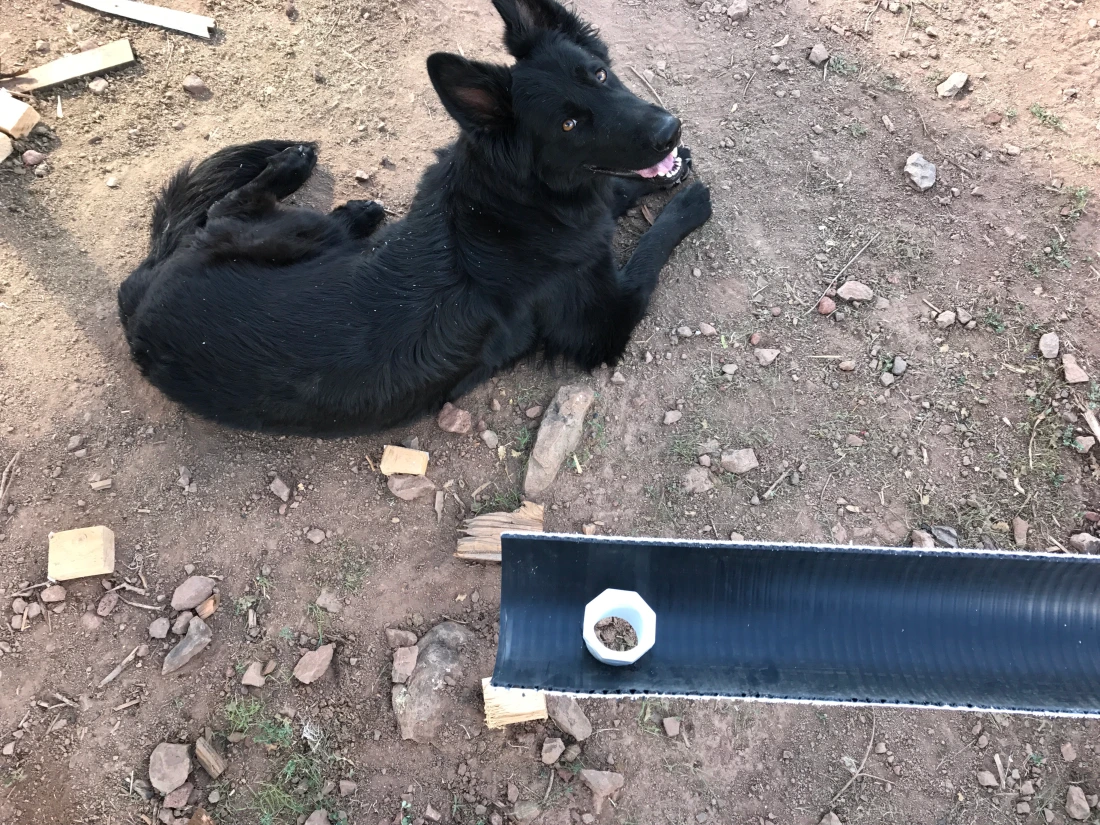
A 6 foot run out pipe was then attached to the bottom of this 3-way and glued into place. The theory is that all the dirt from the roof will fill and settle into the pipe first and once full will overflow and fill your tote with clear water. The bottom of the pipe has a removable cap on it for draining after each rain.


IMG_4490

Step 7.

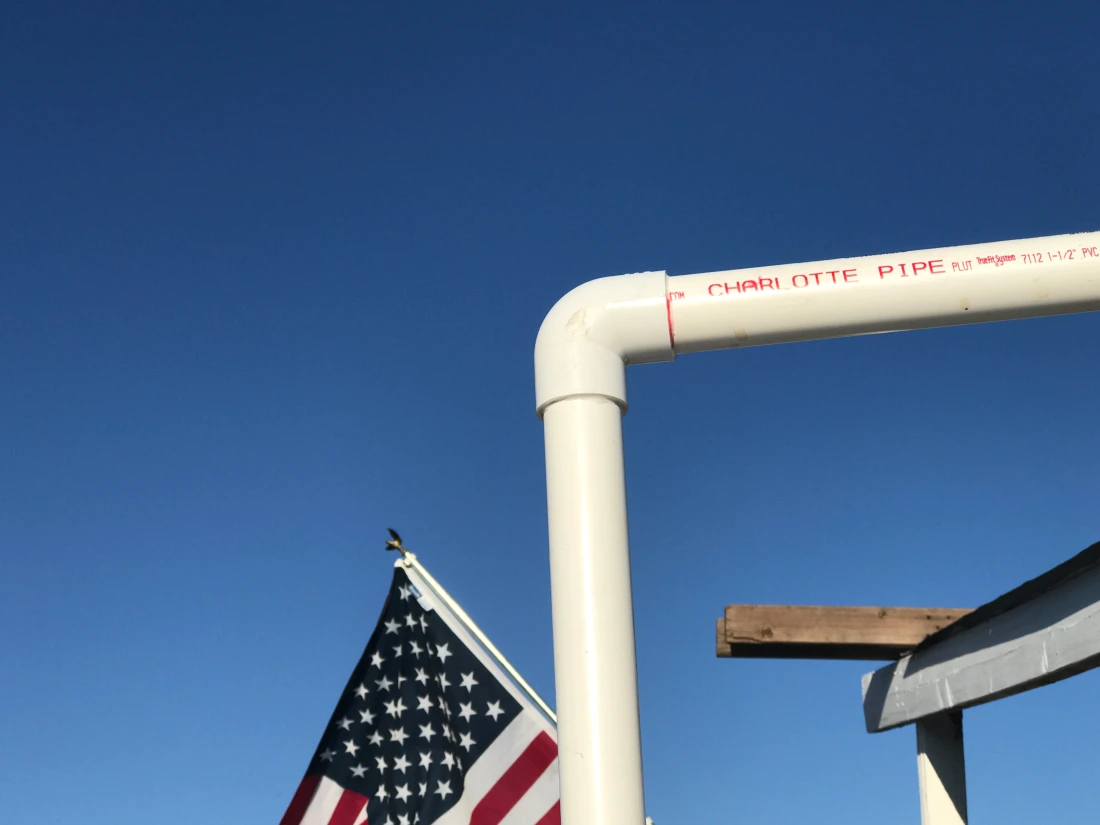
Now measure the length from the run out pipe to the center of the fill hole or cap of your IBC water tote. Be sure to add in the length of pipe that will fit into the 3-way connector and the PVC elbow for the down spout. Cut, glue and fit the remaining 6 foot pipe you have.

IMG_4493

Step 8

Now you can simply glue the remaining elbow on the open end facing down and connect a portion of the PVC pipe to fit just above your water fill hole. On the fill hole you may wish to cut a piece of screen and clamp it over the hole so that bugs don’t get in. Be sure to leave room for your cap to be taken on and off.

IMG_4492

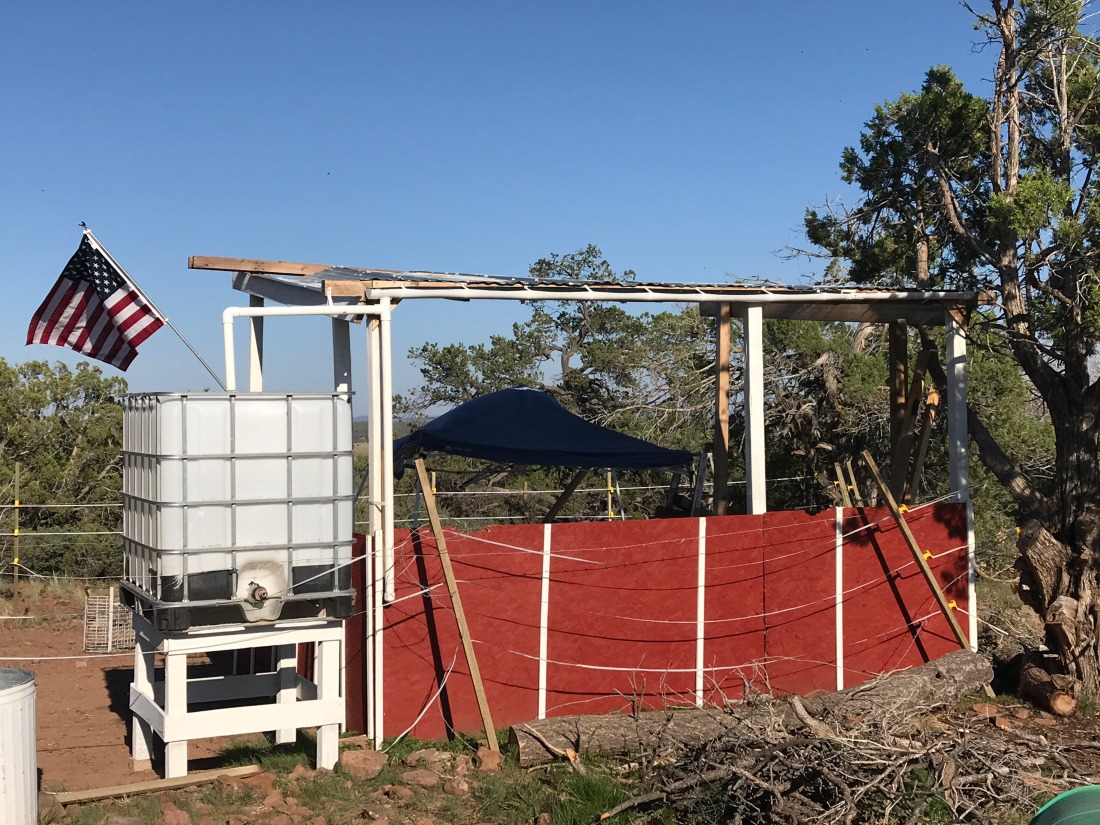
This is what it should look like at the end.  At the very end I placed an extra hanger strap on the rafter to support the weight of the piping. You can see I built a stand for the IBC water tote. This was done to provide gravity fed water to livestock and our garden. The stand was made out of  4 x 4s and 1 x 6 pine. I pretty much destroyed the fence while doing this. At least I know what I’m working on next.

Thanks for reading.

IMG_4483

Remote Off Grid Internet Options

Today I would like to speak about our off grid internet and why we chose what we did.

This is our second off grid homestead. On each one we used different methods of connecting to the internet. Both have their advantages.

IMG_0183

Our first homestead was one that was not as remote as the one we’re working on now. For this reason and due to cost we decided that a satellite connection with a dish through a company called Hughsnet would be our best option. The price was roughly half of what we’re using now and the installation could be done in an afternoon. Since we were off grid and ran our home from a series of 6 volt batteries and 8 solar panels we weren’t really concerned with power consumption because the dish and modem’s power usage was minimal. We never had a problem.

At first, Hughsnet seemed to be a dream come true. We were able to access the internet, view our livestock reports and news almost as well as a cable connection.

This dream slowly unraveled after our first series of wind storms. In many ranching areas high winds occur frequently. The dish became nothing more than a kite and was unable to lock in on any satellites. No amount of adjustment or shoring up would fix the matter.

We learned, like a lot of off grid things, to deal or to work around it. We did both.

Our second homestead was a little bit different. We knew we were remote but didn’t know how remote we were until we tried to get Hughsnet again. I had brought out our old system from our first homestead and figured a technician would simply follow us in and make the necessary adjustments and we’d be back up on our old substandard part time internet connection again. Unlike a TV dish at the time a “Professional” installation person needed to set up your system.

Apparently, We’re to far out here. After numerous calls the folks at Hughsnet decided that due to our remote area it wasn’t worth their time to get someone out to our neck of the woods.

Isn’t that what Satellite internet is for? Remote areas?

This actually turned out to be a blessing. Based on previous scouting trips to the ranch we knew there was one spot that had mild cell phone reception. It was like finding a flea on a Bear’s back. But, we found it. It wasn’t much but it was there. Based on this information we started building the house on that location. We were grateful. We had cell reception in a 15 ft radius and that was it. Yiiipppeee!

It turned out that only one company gets cell service anywhere near here and that company turned out to be Verizon. We soon found ourselves in the big city at a Verizon store and purchased a Verizon Wireless Internet Jetpack. This gives us internet here at the touch of a button and it is immune to the elements. Further, it’s portable and only plugs in to recharge so for our monthly town trips it’s there if we need it.

verizon

The down side? Dang, this thing is expensive. It’s our highest monthly bill and twice the price of Hughsnet. Moreover, we’re only allocated 20GB per month. No more Facebook, No more Youtube, No more podcasts. All of this would have to wait until we get to town.

It works. And it works good!  I figure pay twice the price and get something that works. We were already trained by Hughsnet to modify our usage so why not?

A while ago a friendly e-mail showed up from the good folks at Hughsnet inquiring to see if we would still want internet. It seems we’re suddenly not so remote and it’s available here. They can get a “Professional” out here lickity split!

That was 2 months ago.

sunset


Homemade ATV Dog Carrier

Last week my dog Ranger and I started the shed hunting season with a bang. For those who haven’t heard of shed hunting it’s basically the process of hiking through the woods looking for antlers that have fallen from deer and elk. Every year in the winter and  spring these animals shed their antlers and begin to grow knew ones.  Found antlers are know in certain circles as “white gold”. Every year these are sold by the pound to dealers who visit small towns on their yearly routes.

This brings us to the ATV Dog Carrier. I’ve trained Ranger to sniff out these fallen shed antlers and she really enjoys it. The problem is that many of these areas that we hunt are miles away and by the time we get their the poor dog is already dog tired. With this ATV Dog Carrier I hope to alleviate this problem. Plus, Ranger really loves riding on the back.

Here’s how I did it:

The first requirement is to already have a rack on the back of your ATV. I didn’t so I ordered one on ebay for about $50. Since I have a 1983 3-wheeler it didn’t fit. I did cut the legs off with a grinder and re-welded them to fit my application.

Once this was done I procured 3 2x4s, 4 u-bolts, 3 2×2’s, a handful of screws, a 27 X 39 piece of 1/2 plywood (for my application) and a piece of carpet.

I cut the 2×4’s the length of the rack and affixed them using the u-bolts. This forms the base of the dog carrier.

rack1

Once this was secure and sturdy I cut 13 2×2’s 10 inches long. These will form the rails of the carrier. I screwed these into 2×2 pieces that matched the width and length of the rack. This created a rail 13 inches in height. Once these rails were finished I then secured them all to the 1/2 piece of plywood mentioned above. This makes the platform for the carrier.

rack2

Once this is done screw it all down to the plywood base until it’s secure and add apiece of carpet so your dog has some traction to hold on to. I used staples on the carpet but, screws would work fine as well I would imagine. I cut a half moon in mine for more seating room. Ranger didn’t seem to mind a little less room. The size of the carrier seemed more than adequate for my 70 lb Belgian Sheepdog. I finally got around to painting it to protect it from the elements.  All in all it took a couple of hours from planning to finish for me and I found it to be pretty simple to make. Not to mention a carrier the same size was running about $200 plus shipping on several websites.

This probably won’t last as long but it works for us.

rack3

I trained Ranger to get into the carrier pretty easily by using treats and the “Hup” command. The first couple of times I had to help her up but, after that she got the idea and was chomping at the bit to go. I found that by adding additional weight to the front to offset the extra weight made steering much easier.

If this works for you I’d love to hear about how you did it and if you made any improvements. Thanks


Making Mini Pollen Feeders

These mini pollen feeders for your bees are so easy to make it may not be worth a blog entry but, I’ve been working more than writing for far too many days now so it’s on.

It’s a pretty simple process and only takes a few minutes. You only need a plastic juice bottle, scissors, nails, paint and a hammer.

I started this because I used this same method to make a 5 gallon pollen feeder from a plastic water jug that seemed to be getting overcrowded with bee activity during certain times of the day. It looked almost like a Japanese subway during rush hour.

I used 64 oz. plastic juice bottles that I already had around. They used to be top hive feeders but we have since begun feeding with division board feeders due to the high winds in our area.

Take the bottle and cut a half moon out of the bottom.

bee1

Be sure to take the label off of them. I then painted them with some tan spray paint to keep the plastic from degrading in the sun.

bee2

Once this was done I went down to my apiary and found strategic locations for them in trees. In our area we have a lot of predators so I chose to put them in trees so the foxes and coyotes would have a hard time reaching them.  With a nail I hammered the caps of the bottles to the tree and then screwed the bottle to the tree. Once this was done I filled them with pollen. The bees took to it immediately. They had no problem accepting the fact that they and the feeders were destined to be.

Simplicity sure makes life a lot easier. Enjoy!


bee feeder

Aging Corrugated Metal Panels

I’m currently on a mini project to make a heat shield for the back of my old Franklin wood stove. The heat shield should minimize the amount of heat that hits the wall so my tiny ranch house doesn’t burn down or at least give me a chance to put the flames out. Being so remote, there is no chance the county fire department could get here in time.

Better safe than sorry I’m thinking.

I’ve used this technique to age all the roof panels on our stone cabin at the ranch and it worked pretty well.  Basically, there are only 3 steps after you get your new shiny panels to get the aged look you may like.

Without much hooey, here goes;

1. Grind the panels –  This is probably the most important step. Get a grinder, sand paper or steel wool and start knocking the shine off of the panel. This entails some elbow grease. The more shine you can get off the better. Don’t ninny wagon it!

2. Get corrosion – With a  spray bottle, rag or paint brush spread your choice of corrosive agent on the panels. I use either Muriatic Acid or vinegar. You may also use bleach or if time permits you can let good ol’ Ma Nature take it’s coarse. Get the rockin’ chair out for this one because it may take some time depending on your climate. Let the stuff sit for a while but don’t let it dry too much. Expect some off gassing and stand down wind. You are doing this outside arn’t you? I’d use a respirator if you have one. We don’t so a dirty old t-shirt does the trick.

3. Get age or rust look – Again with the spray bottle, rag or paint brush put Hydrogen Peroxide and a pinch of salt on the panel. Well, maybe more like a handful of salt. heatsheildstove Dissolve it in water would be best. Salt and metal don’t like each other’s company very much when they get together. Add in Hydrogen Peroxide to the tryst and the panel should start looking like a spurned lover in short order. I  allow this to sit over night but do check it from time to time to see the results and sometimes add more salt and peroxide if needed.

It’s pretty much that simple. You can repeat the process after you have rinsed the panel to get the desired aged look. Don’t forget to rinse the panel off before you use it for your application.

If you have any suggestions or have tried this method please let me know how you’ve fared.

Metal

Building a chicken coop, the cornerstone of your homestead

This is a great example of a nice aesthetically pleasing coop.

two branches homestead

IMG_6183 (1)

One of the most important buildings on any homestead is the chicken coop.  On our homestead we eat eggs every morning.  Pound for pound the chicken coop is the undisputed champion of providing meals.  Our coop is located where we can see it from our back door.  So when it came time to build it we knew it had to look good too.  We chose to make it look like a small rustic cabin, and were able to acquire rough cut hemlock for the exterior.  This also saved money in the end, as the lumber also has some natural resistance to rot.  The next challenges when building a coop are to maximize space and ease of use.  We chose to put the nesting boxes directly in front of the door, this made it easier to get breakfast in the morning.

img_2032

The floor space behind the door can be used by…

View original post 439 more words

How to Get FREE or Cheap Homestead Land Honestly – Part 1

Six different ways you can get FREE or cheap homestead land honestly. This is part one where we discuss ways and methods to get property to homestead that won’t require a mortgage . In the next podcast we speak about what to look for once you have found the area and the parcel you are considering.

  1. Buy from a Realtor
  2. Tax lien sales and Tax deed sales
  3. The doctrine of adverse possession
  4. Contact an owner
  5. Free land
  6. Low tech and internet searches

Cimarron Ranch Homestead Podcast 1

An off grid homestead adventure! Follow us as we explore the hardships and joys of living 2 hours from any paved road and miles from any neighbor in a remote solar powered stone cabin. Experience the blank canvas build from scratch with us as we carve out a self sufficient homestead in the western wilderness.